sandeepk

100DaysToOffLoad

Today, we are going to see how we can use | operator in our python code to achieve clean code.

Here is the code where we have used map and filter for a specific operation.

In [1]: arr = [11, 12, 14, 15, 18]
In [2]: list(map(lambda x: x * 2, filter(lambda x: x%2 ==1, arr)))
Out[2]: [22, 30]

The same code with Pipes.

In [1]: from pipe import select, where
In [2]: arr = [11, 12, 14, 15, 18]
In [3]: list(arr | where (lambda x: x%2 ==1) | select(lambda x:x *2))
Out[3]: [22, 30]

Pipes passes the result of one function to another function, have inbuilt pipes method like select, where, tee, traverse.

Install Pipe

>> pip install pipe

traverse

Recursively unfold iterable:

In [12]: arr = [[1,2,3], [3,4,[56]]]
In [13]: list(arr | traverse)
Out[13]: [1, 2, 3, 3, 4, 56]

select()

An alias for map().

In [1]: arr = [11, 12, 14, 15, 18]
In [2]: list(filter(lambda x: x%2 ==1, arr))
Out[2]: [11, 15]

where()

Only yields the matching items of the given iterable:

In [1]: arr = [11, 12, 14, 15, 18]
In [2]: list(arr | where(lambda x: x % 2 == 0))
Out[2]: [12, 14, 18]

sort()

Like Python's built-in “sorted” primitive. Allows cmp (Python 2.x only), key, and reverse arguments. By default, sorts using the identity function as the key.

In [1]:  ''.join("python" | sort)
Out[1]:  'hnopty'

reverse

Like Python's built-in “reversed” primitive.

In [1]:  list([1, 2, 3] | reverse)
Out[1]:   [3, 2, 1]

strip

Like Python's strip-method for str.

In [1]:  '  abc   ' | strip
Out[1]:  'abc'

That's all for today, In this blog you have seen how to install the Pipe and use the Pipe to write clean and short code using inbuilt pipes, you can check more over here

Cheers!

#100DaysToOffload #Python #DGPLUG

My work required me to profile one of our Django applications, to help identify the point in the application which we can improve to reach our North Star. So, I thought it will be great to share my learning and tools, that I have used to get the job done.

What is Profiling?

Profiling is a measure of the time or memory consumption of the running program. This data further can be used for program optimization.

They are many tools/libraries out there which can be used to do the job. I have found these helpful.

Apache JMeter

It is open-source software, which is great to load and performance test web applications. It's easy to set up and can be configured for what we want in the result report.

Pyinstrument

Pyinstrument is a Python profiler that offers a Django middleware to record the profiling. The profiler generates profile data for every request. The PYINSTRUMENTPROFILEDIR contains a directory that stores the profile data, which is in HTML format. You can check how it works over here

Django Query Count

Django Query Count is a middleware that prints the number of database queries made during the request processing. There are two possible settings for this, which can be found here

Django Silk

Django Silk is middleware for intercepting Requests/Responses. We can profile a block of code or functions, either manually or dynamically. It also has a user interface for inspection and visualization

So, here are some of the tools which can be of great help in profiling your code and putting your effort in the right direction of optimization applications.

Cheers!

#100DaysToOffload #Python #DGPLUG

Nowadays, every project has a docker image, to ease out the local setup and deployment process. We can attach these running container to our editor and can do changes on the go. We will be talking about the VS Code editor and how to use it to attach to the running container.

First thing first, run your container image and open up the VS Code editor, you will require to install following plugin

  1. Remote-Container
  2. Remote Development

Now, after installing these plugins, follow the steps below.

  • Press the F1 key to open Command Palette and choose Remote-Containers: Attach to Running Container... VS Code Palette
  • Choose your running container from the list, and voilà.
  • After this step, a new VS Code editor will open, which will be connected to your code. VS Code bar
  • You need to re-install plugin for this again form marketplace.

After this, you are all set to playground the code.

Cheers!

#100DaysToOffload #VSCode #Containers #Docker

Today we are going to talk about the modes of image. The mode of image defines the depth and type of the pixel. These string values help you understand different information about the image. As of this writing, we have 11 standard modes.

  • 1 (1-bit pixels, black and white, stored with one pixel per byte)

  • L (8-bit pixels, black and white)

  • P (8-bit pixels, mapped to any other mode using a color palette)

  • RGB (3x8-bit pixels, true color)

  • RGBA (4x8-bit pixels, true color with transparency mask)

  • CMYK (4x8-bit pixels, color separation)

  • YCbCr (3x8-bit pixels, color video format)

  • LAB (3x8-bit pixels, the Lab color space)

  • HSV (3x8-bit pixels, Hue, Saturation, Value color space)

  • I (32-bit signed integer pixels)

  • F (32-bit floating point pixels)

So, 1-bit pixel range from 0-1 and 8-bit pixel range from 0-255. The common modes are RGB, RGBA, P mode. Image also consist of band, common band like RGB for red, green, blue also have an Alpha(A) transparency, mainly for PNG image.

We can also change these modes with the help of convert or creating new image with the help of pillow library. Let see the code for example

# here we convert RGBA image to RGB image and painting the Alpha 
# trasparency band to white color
image = Image.open("path/to/image")
image.mode # this will tell image mode
new_image = Image.new("RGB", image.size, (255, 255, 255))
new_image.paste(image, mask=image.split()[3])

That's all about the modes. There is also raw modes where you can create even your modes, but will save that for another blog post :)

Cheers!

#100DaysToOffload #Python #Pillow

The other day, I was working with images which need me to use image EXIF rotation to show in right orientation. Which leads me to read about EXIF, so here are my notes about the same.

What is EXIF Exchange image file format is a protocol whose initial definition was produced by Japan Electronic Industries Development Association(JEIDA). It stores the various meta information of the images taken by a digital camera, which is stored as tag and value. There are many tags but for my problem Orientation (rotation) tag is of interest. The orientation tag value can be from 1 to 8 which signifies different meanings according to the position of the camera while taking the image.

EXIF Meta information from GIMP 
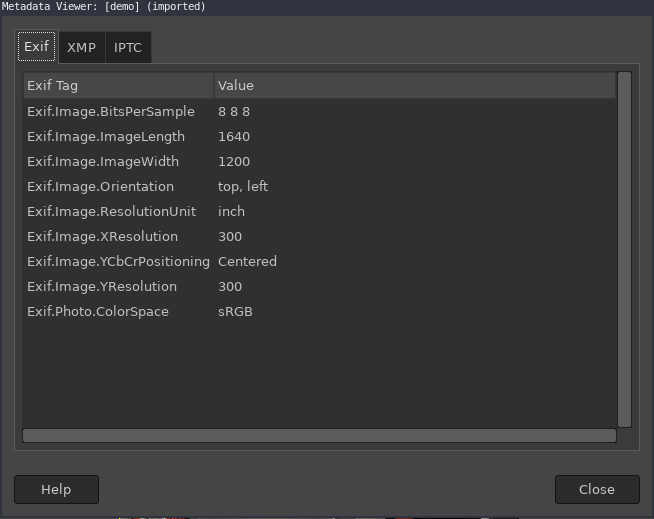
Image metadata from GIMP tool

Different Rotation EXIF rotation helps the image viewer application to show the image in the right orientation if it's compatible with the EXIF metadata. Window users might have noticed that before Window 8 image shown is without rotation, but after Window 8 all images are shown in their right orientation because of the compatibility with EXIF.

Different Rotation Above image is taken from this blog

EXIF Orientation Tag Value Row Column
1 Top Left Side
3 Bottom Right Side
6 Right Side Top
8 Left Side Bottom

What Problem I have and how EXIF meta helpful So, the issue I am trying to solve is that we need to show the user's uploaded images that can have a different orientation, to fix this we need to rotate images which can be achieved at the server or the browser side. Working with Python makes it easy to handle the image with the help of Pillow library.

Image with rotation 3 Image with different rotation

from PIL import Image

rotation_dict = {3: 180, 6: 270, 8: 90}
EXIF_ORIENTATION_TAG = 274
image = Image.open(image)
exif_data = image._getexif()
if exif_data:
    rotation_degree = rotation_dict.get(exif_data.get(EXIF_ORIENTATION_TAG))
    if rotation_degree:
        image_file = image_file.rotate(rotation_degree)

This also can be achieved with CSS image-orientation which can be used with mostly all browser

/* keyword values */
image-orientation: none;
image-orientation: from-image; /* Use EXIF data from the image */

/* Global values */
image-orientation: inherit;
image-orientation: initial;
image-orientation: revert;
image-orientation: unset;

At last, I go with the CSS solution, which solves our use case with the least effort/code changes.

Cheers!

#100DaysToOffload #TIL

A data class is a class containing data only, from Python3.7 we can define a data class with the help of decorator @dataclass, which build the class with the basic functionality like __init__ , __repr__, __eq__ and more special methods.

Let see how to define your data class with the decorator @dataclass

from dataclasses import dataclass

@dataclass
class Batch:
    sku: int
    name: str
    qty: int

>>> Batch(1, 'desk', 100)
Batch(sku=1, name='desk', qty=100)

We can also add the default value to the data class, which works exactly as if we do in the __init__ method of regular class. As you have noticed in the above we have defined the fields with type hints, which is kind of mandatory thing in the data class, if you do not do it will not take the field in your data class.

@dataclass
class Batch:
    sku: int = 1
    name: str = 'desk'
    qty: int = 100

# if you don't want to explicity type the fields you can use any
from typing import Any
class AnyBatch:
    sku: Any
    name: Any = 'desk'
    qty: Any = 100

If you want to define mutable default value in data class, it can be done with the help of default_factory and field. Field() is used to customize each field in data class, different parameter that can be passed to field are default_factory, compare, hash, init, you can check about them over here

from dataclasses import dataclass, field
from typing import List

@dataclass()
class Batch:
    sku: int
    name: str
    qty: int = 0
    creator: List[str] = field(default_factory=<function/mutable value>)

Immutable Data Class we can also define our data class as immutable by setting frozen=True, which basically means we cannot assign value to the fields after creation

@dataclass(frozen=True)
class Batch:
    sku: int
    name: str
    qty: int = 0

>>> b = Batch(12, 'desk', 100)
>>> b.qty 
100
>>> b.qty = 90
dataclasses.FrozenInstanceError: cannot assign to field 'qty'

Data class saves us from writing boilerplate code, help us to focus on logic, this new feature of Python3.7 is great, so what waiting for go and right some data classes.

Cheers!

#100DaysToOffload #Python #DataClass #TIL #DGPLUG

Ansible's roles allow grouping the content, which can be reused and easily share with other users. The role consists of vars, files, tasks, and other artifacts in a standard directory structure which have these subdirectories.

  • Tasks
  • Handlers
  • Library
  • Default
  • Vars
  • Files
  • Templates
  • Meta

We can use roles in the playbook or task with the help of Include and Import. To know more about Import/Include, you can check here

  • At Playbook level with the roles
  • At task level with include_roles
  • At task level with import_roles

Playbook Roles at playbook level are imported statically and executes the playbook in this order

  • Pre tasks
  • Roles listed in the playbook
  • Tasks define in the playbook and any handler triggered by the tasks
  • Post tasks define after the role
---
- hosts: webservers
  roles:
    - aws

Task with Include

---
- hosts: all
  tasks:
    - name: Use a dynamic roles
       include_roles:
           name: role_name  

Task with Import

---
- hosts: all
  tasks:
    - name: Use a static roles
       import_role:
           name: role_name  

Passing parameter to the roles

---
- hosts: all
  roles:
    - { role: aws, message: "ec2" }
    - { role: aws, message: "s3" }

Conditionally adding roles

---
- hosts: all
  tasks:
    - name: Include the some_role role
      include_role:
        name: some_role
      when: "ansible_facts['os_family'] == 'Ubuntu'"

Ansible's roles are really helpful to group the similar content and use in the different playbook and give the feasibility to the user to share with other which saves a lot of work. It's worth using them and shares your roles in the community to help others.

Cheers!

#100DaysToOffload #Ansible

In Ansible playbooks are a collection of different tasks. It's a good idea to break the tasks into the different files, which make it easier to include/import these task in different playbooks. Now the question is when to use include or import and how these two are different from each other?

Ansible provides four distributed – Variables – Task – Playbook – Role

Include

Including variables, tasks, or role adds them into the playbook dynamically. This means when Ansible processes these files as they come up they are included in the current playbook as its variable, task, or role. So, these can be affected by the previous tasks.

Playbook's can not be used with the include

Import

Importing task, playbook, or role add them into playbook statically. Ansible pre-processes these files before it runs any task in the playbook, which means these are not affected by other tasks.

Tip: Import variables if you want to use these more than once in the playbook.

Import and Include differ with the way Ansible loads these files into the playbook. So, it is good to use the one which best fits your use case.

Cheers!

#100DaysToOffload #Ansible

Ansible stops executing on the host whenever it receives a non-zero return code from a command. We can handle these situations with the helps of settings and tools to behave as it we want.

Ignoring Errors Ansible stops executing commands on the host when it receives non-zero code, but we can ignore these errors and run the rest of the tasks as it is.

- name: I will cause an error
  ...configs
  ignore_errors: yes

Failed when Ansible let you define the condition when you want explicitly fail when a certain condition is true.

- name: Fail task under certain condition true
  command: ls/tmp/dir_not_exist
  register: result
  failed_when: result.rc == 0

Aborting on first error anyerrorsfatal finishes the fatal task on all hosts in the current batch, then stops executing on all hosts.

- hosts: somehosts
  any_errors_fatal: true
  tasks:
    - block:
         - include_tasks: sometask.yml

Handling errors with blocks Ansible let you control errors in a block with rescue and always section. In rescue, we can define tasks which we want to run when an earlier task in a block fails. You can also think of rescue as except and always as finally in other languages to handle errors.

task:
- name: tasks to be run
  block:
     - name: task 1
       // code
     - name: task 2
       // code
     - name: task 3
       // code
rescue:
     - name: Run when one of the above task fails
       // code
always:
     - name: Always run 
       // code

Ansible provide ignore, rescue, always, failed_when to easily handle the behavior of playbook when we face any errors. We can use these commands/settings to gracefully record errors and take specific action.

Cheers!

#100DaysToOffload #Ansible

Ansible's tags are helpful to run a specific part of the playbook, rather running the whole playbook. Using tags, you can run or skip the tasks.

Tags can be added to one task or multiple tasks or role, block etc. Let see how to do that

Adding tags to a task

  tasks:
  - name: Assign the var
    apt:
      name: apache2
      state: latest
    tags:
      - vars
  - name: Enable and run httpd
    apt:
      name: httpd
      state: started
      enabled: 'yes'
    tags:
      - httpd
      - vars

Adding tags to role

roles:
  - role: config
    vars:
      port: 8003
    tags: [ web, flask ]

Adding tags to block All the tasks in the block will share the same tag's

tasks:
- name: git tasks
  tags: git
  block:
  - name: install apache
    apt:
      name: git
      state: latest

Special tags Ansible have two special tags, never and always. If you add always tag to task, play, Ansible will always run the task or play, unless explicitly asked to skip with the help of (—skip-tags always)

On the other hand, never tag if assign to a task or play, Ansible will skip that task or play unless you explicitly asked it (—tags never).

Running the Playbook with tags

  • will run tasks with tag git : ansible-playbook example.yml --tags "git"

  • will not run tasks with tag git : ansible-playbook example.yml --skip-tags "git"

  • list all the tags : ansible-playbook example.yml --list-tags

  • run all tasks, ignore tags (default behavior): --tags all

  • run only tasks with either the tag tag1 or the tag tag2: --tags [tag1, tag2]

  • run all tasks, except those with either the tag tag3 or the tag tag4: --skip-tags [tag3, tag4]

  • run only tasks with at least one tag: --tags tagged

  • run only tasks with no tags: --tags untagged

That's all about the Ansible tags. Now go and tag your tasks :).

Cheers!

#100DaysToOffload #Ansible